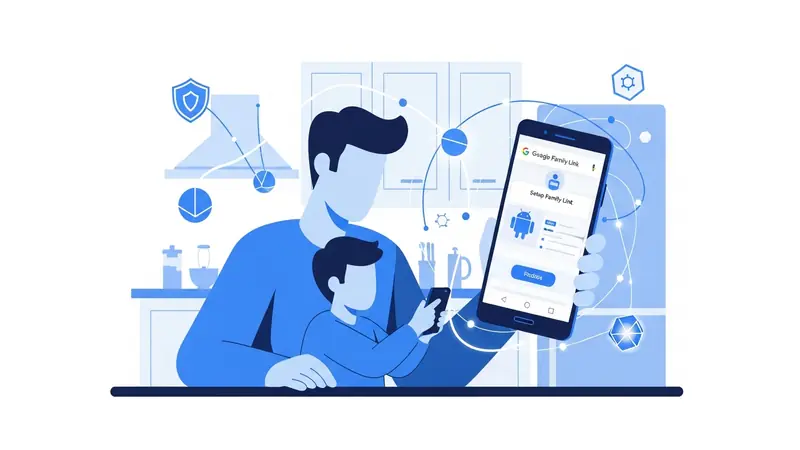
Google Family Link Setup Guide: 8 Steps (Tested 2026)
What You’ll Learn (And Why This Matters Right Now)
Your kid just got their first Android phone. Or maybe they’ve had one for a while, and you’re realizing you have no idea what they’re doing on it at 11 PM on a school night.
Google Family Link is Android’s built-in parental control system. It’s free, it’s surprisingly powerful, and it works on any Android device running version 7.0 or newer. This guide walks you through setup — from creating the family group to locking down app permissions — before your teenager figures out the workarounds.
I tested this setup on an HP Chromebook, a SmartTalk Android phone, and an Android tablet running Android 13. All three linked to my parent account without issue — the only friction was on the tablet, where I was signed into a different Gmail account and had to dig up the password to switch over.
We’re covering: creating supervised accounts, setting screen time limits, approving app downloads, filtering content, tracking location, and the common mistakes that let kids bypass everything you just configured. If you’ve got 30 minutes and your kid’s phone, you can have this done before dinner.
Heads up: if your child is under 13, you’ll need a credit card ready when you create their Google account. Google charges $0.30 to verify parental consent under COPPA, then refunds it. More on this in Step 2.
What You Need Before You Start
Make sure you have these ready:
– Your own Android or iOS device with the Family Link app installed (download from Google Play or App Store)
– Your child’s Android phone or tablet (Android 7.0 or newer)
– Your Google account credentials
– Your child’s birthdate (Google uses this to determine age-appropriate restrictions)
– A credit card (for kids under 13 — Google charges $0.30 to verify parental consent, then refunds it)
– 15 to 30 minutes of uninterrupted time — you’ll need your kid present for part of this
One critical note: if your child already has a Google account and they’re under 13, you’ll need to supervise their existing account rather than create a new one. Google changed this policy in 2024 to prevent kids from creating unsupervised accounts. If they’re 13 or older, they can choose whether to accept supervision (good luck with that conversation).
Step 1: Install Family Link on Your Phone or PC
Download “Google Family Link for parents” from the Google Play Store or Apple App Store on your device. It works cross-platform — you can manage an Android phone from an iPhone.
If you are on a PC use this URL : https://families.google/familylink/
Open the app and tap Get Started. Sign in with your Google account. This is the parent/manager account for the family group.
The app will ask if your child has a Google account already. If they’re under 13 and don’t have one, select No. If they already have an account (even if they set it up themselves), select Yes and you’ll go through the supervision process instead.
Step 2: Create Your Child’s Supervised Google Account
If your child doesn’t have a Google account yet, Family Link walks you through creating one. You’ll need their name, birthdate, a username (this becomes their Gmail address), and a password you set and share with them.
Google will then ask for parental consent. This is where the credit card comes in. Google requires this to comply with the Children’s Online Privacy Protection Act (COPPA), which mandates verifiable parental consent before a company can collect personal data from a minor. Google charges $0.30 (or sometimes places a $1.00 temporary hold) to confirm an adult with a valid card is authorizing the account.
The charge is temporary. It’s either cancelled immediately or refunded shortly after setup completes. You can also verify with a government ID photo instead if you’d rather not use a card.
Write down the username and password. You’ll need to enter them on your child’s device next.
Step 3: Set Up Family Link on Your Child’s Device
Now grab your kid’s phone.
For a new device: during Android setup, when it asks you to sign in with a Google account, enter the supervised account credentials. Android detects it’s a child account and automatically prompts you to finish Family Link setup.
For an existing device: open Settings, then Google, then Parental controls, then Get started. Sign in with the child account credentials. The device connects to your parent account and downloads restrictions.
You’ll see a code on your child’s device. Open the Family Link app on your phone and enter this code to link the devices. This takes 2 to 3 minutes — don’t close either app during this process.
Step 4: Configure Screen Time Limits
Open the Family Link app on your phone, tap your child’s name, then Controls.
Daily limits: set the maximum hours per day. When time runs out, the device locks except for parent-approved apps. Limits reset at midnight.
Bedtime: set a time range when the device locks completely. During bedtime, your kid can only make emergency calls. A common setup is 9 PM to 7 AM on school nights, 10 PM to 8 AM on weekends.
These limits apply to the entire device, not individual apps. If you set a 2-hour daily limit, that’s 2 hours total across YouTube, games, messaging — everything. Plan accordingly.
You can grant bonus time on the fly from your parent app, and your kid can request more time too (you get a notification). Useful for homework that runs long or video chats with grandparents.
Something to watch out for: a year or so ago my daughter went on a 3-day school trip. I had her screen set to lock at 10 PM. Her class got back to the hotel late, and she couldn’t text or call us. She had to borrow a friend’s phone because I wasn’t watching my own to approve a bedtime override. Lesson learned: when your kid is traveling, either loosen the bedtime window for those days or keep your phone in reach so you can grant bonus time fast.
Step 5: Lock Down App Downloads
By default, Family Link requires your approval for every app download from the Google Play Store. In the Family Link app, go to Controls, then Google Play. You’ll see three options:
– All content: your child can download anything without approval (don’t choose this)
– Require approval for all content: you approve every app, even free ones (recommended for under 10)
– Allow certain content ratings: apps rated for their age are auto-approved, mature apps require your approval (solid middle ground for ages 10 to 13)
When your child tries to download an app, you get a notification with the app’s description, permissions, and ratings. You approve or block. Blocked apps disappear from their Play Store search results.
In my experience, the apps kids request most are games (Roblox, Minecraft), social apps (TikTok, Snapchat, Discord), and messaging apps. The approval step is where you get to have a real conversation about why some apps aren’t appropriate yet. That conversation matters more than the block itself.
For my kids it was Clash Royale and Crossy Road. My son especially. He was forever asking for extra time after I let him download them, and the approval conversation became a weekly negotiation rather than a one-time decision.
Step 6: Set Content Filters for Chrome and YouTube
Chrome filtering: in Family Link, go to Controls, then Filters on Google Chrome. You’ll see three options:
– Try to block mature sites: hides sexually explicit and violent sites. Works for most families.
– Only allow certain sites: whitelist mode. Extremely restrictive but useful for younger kids.
– Allow all sites: turns filtering off entirely, except for any sites you’ve manually blocked.
Important: Chrome filtering only works in Chrome. If your kid downloads Firefox, Brave, or another browser, these filters don’t apply. This is why app approval matters — block alternative browsers during the approval process.
YouTube restrictions: go to Controls, then Content restrictions, then YouTube. You can choose between:
– YouTube Kids: heavily filtered, designed for kids up to age 12, with content tiers for Preschool (4 and under), Younger (5 to 8), and Older (9 to 12).
– Supervised YouTube: three content level settings (Explore, Explore More, Most of YouTube) filtered based on content maturity, not strictly age.
– Standard YouTube with Restricted Mode: uses automated signals like video title, description, and metadata to block flagged mature content, but isn’t foolproof.
YouTube is where kids most commonly encounter inappropriate content. The supervised experience isn’t perfect — it relies on Google’s automated classification — but it’s significantly better than unrestricted access. According to a 2020 Common Sense Media study with the University of Michigan, 95% of early childhood YouTube videos included advertising, one in five videos contained age-inappropriate ads (whiskey, violent games, lingerie), and 30% contained at least mild physical violence.
Step 7: Configure Location Tracking
In the Family Link app, tap your child’s profile, then Location. Toggle on Show location. You’ll see their current location on a map, updated in near-real-time when their device is online.
This feature is a judgment call. Some parents feel it’s essential (knowing your kid made it to school). Others — especially parents of teenagers — feel it’s invasive. There’s no universal right answer.
If you enable it, tell your child. Frame it as safety, not surveillance: “I want to know you’re safe, not spy on everywhere you go.” And follow through — don’t weaponize location data in arguments.
Step 8: Review App Permissions
Even after approving an app, you can control its permissions. In Family Link, tap your child’s profile, then App activity, then select an app, then App permissions.
Toggle off permissions the app doesn’t actually need. A flashlight app doesn’t need access to contacts or location. A messaging app probably does need camera and microphone, but maybe not location. Good rule of thumb: grant only the permissions necessary for the app to work. If a free game asks for contacts, location, camera, and microphone, that’s a red flag — block it.
You can also see how much time your child spends in each app under App activity. It’s useful for spotting which apps are eating up screen time (usually YouTube, TikTok, or Roblox).
Quick check that everything’s working: set a 5-minute daily limit on the device. If it locks after 5 minutes, you’re good.
Common Ways Kids Bypass Family Link
Here are the workarounds kids actually try — and how to prevent them.
Factory reset: on Android 7 to 9, a factory reset removes Family Link supervision. Google patched this in Android 10+. Solution: update the device to Android 10 or newer, or enable Factory Reset Protection in Settings, then Security.
Adding a second Google account: a second, unsupervised account lets them switch profiles and bypass restrictions. Family Link blocks this by default on Android 10+. On older versions, check Settings, then Accounts regularly.
Sideloading APK files: kids can download app files from websites and install them without the Play Store. In Family Link, go to Controls, then Account settings, then toggle off Allow installation from unknown sources.
VPN apps: a VPN routes traffic around content filters. Block VPN apps during the approval process unless your family uses one for public Wi-Fi. If you do approve a VPN, know that it undermines content filtering.
Changing the clock: Family Link syncs time from Google’s servers and ignores manual changes, so this one’s already handled.
What Family Link Doesn’t Cover
Family Link is powerful for a free tool, but it has gaps. It can’t see conversations inside apps like Instagram, Snapchat, or Discord (for that, look at paid tools like Bark or Qustodio, but only after you’ve maxed out the free options here). It doesn’t monitor SMS or MMS. School-issued devices are managed by the school’s IT department, so talk to them about what’s already in place. And Family Link filters on-device only, not at the network level — a tech-savvy kid could use a laptop or game console to bypass device restrictions. For network-level filtering, look at DNS-based options like OpenDNS or CleanBrowsing (both have free tiers).
One More Thing: Talk to Your Kid
The setup is the easy part. The harder part is the conversation.
Before you hand over the configured phone, talk about what apps are allowed and why, what happens if limits get broken, and what they should do if they see something scary or uncomfortable online. Frame Family Link as protection, not punishment — you’re giving them a safe space to learn digital responsibility before they’re old enough for the full internet unsupervised.
The American Academy of Pediatrics has a free Family Media Plan tool at HealthyChildren.org that helps structure this conversation. It’s worth 15 minutes.
Link: https://www.healthychildren.org/English/fmp/Pages/MediaPlan.aspx
Every kid is different — settings that work for one family won’t fit another. If something here doesn’t feel right for your situation, talk to your pediatrician, school counselor, or a resource like ConnectSafely.org.
You’ve got this. Your kid’s first phone is a big milestone — for both of you. With Family Link set up right and an ongoing conversation about digital safety, you’re giving them a real foundation.
Next in This Series
Once Family Link is running smoothly, the next thing to learn is the advanced controls — app-specific time limits, the YouTube settings that actually work, and the five bypasses kids try once they figure out the basics.
Read: Google Family Link Advanced Controls →